Sending trial notifications with provisional authorization on iOS
In the world of iOS app development, engaging users effectively while respecting their preferences is crucial. Notifications can be a powerful tool for keeping users informed and engaged, but the challenge often lies in obtaining permission to send these notifications. Apple's User Notifications framework offers a solution that strikes a balance between engagement and user consent: provisional notifications. This feature allows apps to send notifications without upfront permission, providing a gentle introduction to our app's notifications.
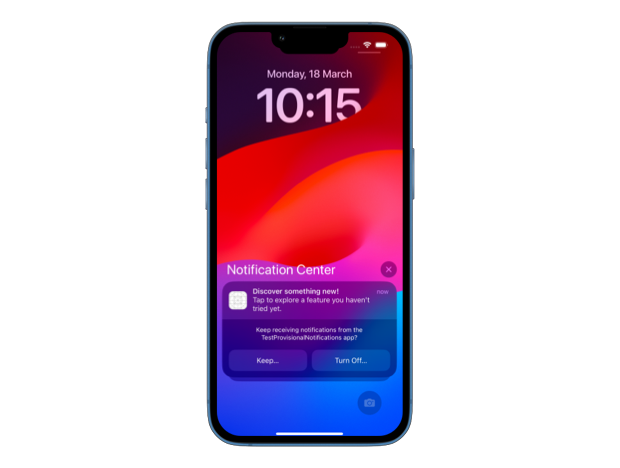
Provisional authorization allows apps to send notifications silently to the Notification Center, bypassing the lock screen, banners, and sounds. This is an excellent way to showcase the value of our notifications without being intrusive.
# Requesting provisional authorization
To request provisional authorization, we'll need to use the same method as we'd use for the full authorization requestAuthorization(options:completionHandler:) on UNUserNotificationCenter, but we'll need to add the provisional option.
let center = UNUserNotificationCenter.current()
do {
    try await center.requestAuthorization(
        options: [.alert, .sound, .badge, .provisional]
    )
} catch {
    print("Error requesting notification authorization: \(error)")
}
This code won't trigger a dialog prompting the user to allow notifications like it would do when requesting full authorization. It will silently grant our app notification permissions when first called. Since it won't be disruptive for the user, we don't have to wait for the right time to request authorization, and can do it right on app launch.
import UIKit
import UserNotifications

class AppDelegate: NSObject, UIApplicationDelegate {
    func application(
        _ application: UIApplication,
        didFinishLaunchingWithOptions launchOptions: [
            UIApplication.LaunchOptionsKey: Any
        ]?
    ) -> Bool {
        Task {
            let center = UNUserNotificationCenter.current()
            let authorizationStatus = await center
                .notificationSettings().authorizationStatus

            if authorizationStatus != .authorized ||
                authorizationStatus != .provisional {
                do {
                    try await center.requestAuthorization(
                        options: [.alert, .sound, .badge, .provisional]
                    )
                } catch {
                    print("Error requesting notification authorization: \(error)")
                }
            }
        }
        return true
    }
}
# Scheduling a notification
To demonstrate the value of our app's notifications, we can start targeting the user with local or remote notifications. We will schedule a local one as an example here, but you can check out my previous post iOS app setup for remote push notifications if you want to trial remote push notifications instead.
Here's an example of scheduling a local notification that will trigger 10 seconds after being set up, perfect for testing the provisional notifications flow:
class AppDelegate: NSObject, UIApplicationDelegate {
    func scheduleTestNotification() {
        let content = UNMutableNotificationContent()
        content.title = "Discover something new!"
        content.body = "Tap to explore a feature you haven't tried yet."

        let trigger = UNTimeIntervalNotificationTrigger(
            timeInterval: 10,
            repeats: false
        )
        let request = UNNotificationRequest(
            identifier: UUID().uuidString,
            content: content,
            trigger: trigger
        )

        UNUserNotificationCenter.current().add(request) { error in
            if let error = error {
                print("Error scheduling notification: \(error)")
            }
        }
    }

    func application(
        _ application: UIApplication,
        didFinishLaunchingWithOptions launchOptions: [
            UIApplication.LaunchOptionsKey: Any
        ]?
    ) -> Bool {
        Task {
            ...

            if authorizationStatus != .authorized ||
                settings.authorizationStatus != .provisional {
                ...
            }

            scheduleTestNotification()
        }
        return true
    }
}
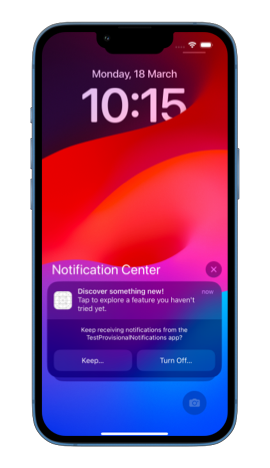
Since we just have provisional authorization at this point, we will only see our notification in the Notification Center's history.


# Encouraging full authorization
After users have experienced the value of our notifications through the provisional ones, we might want to encourage them to opt for full notification permissions. This can be done by explaining the benefits of enabling notifications through an in-app message or alert, ideally at a moment when the user is most likely to appreciate the value of full notifications.
struct EnableNotificationsView: View {
    var body: some View {
        VStack {
            Text("Get the most out of our app!")
            Text("Enable notification banners and sounds to stay up-to-date with everything our app has to offer.")
            Button("Go to settings") {
                openAppSettings()
            }
        }
        .padding()
        .multilineTextAlignment(.center)
    }

    func openAppSettings() {
        guard let url = URL(
            string: UIApplication.openSettingsURLString
        ) else {
            return
        }

        UIApplication.shared.open(url)
    }
}
This view serves as a gentle reminder of the benefits of full notifications, making it easy for users to act immediately by taking them to the settings page. By explaining the value and making the process straightforward, we are more likely to convert them, ensuring our users remain active and informed about our app's offerings.
Implementing provisional notifications in our app is a great way to engage users. By following the guidelines provided by Apple, we can create a non-intrusive notification experience that respects user preferences while showcasing the value of staying connected. We should also remember, that with all types of notifications it's important to be informative, timely, and respectful of the user's choices.


